
Germination is the most crucial and exciting stage in growing any plant. Hemp is no exception here. A correct start determines the entire future life of the plant: its health, vigor, and yield. Let’s break down the process of germinating hemp seeds (referring to industrial, technical hemp with low levels of psychoactive substances, approved for cultivation in accordance with your country’s laws) step by step.
Most Important Preface: Legality
Before purchasing seeds, thoroughly research the legislation of your country and region. In many countries, it is only legal to cultivate certified varieties of industrial hemp with a THC content of less than 0.2% or 0.3%. You are responsible for complying with the law.
Part 1: Preparation and Seed Selection
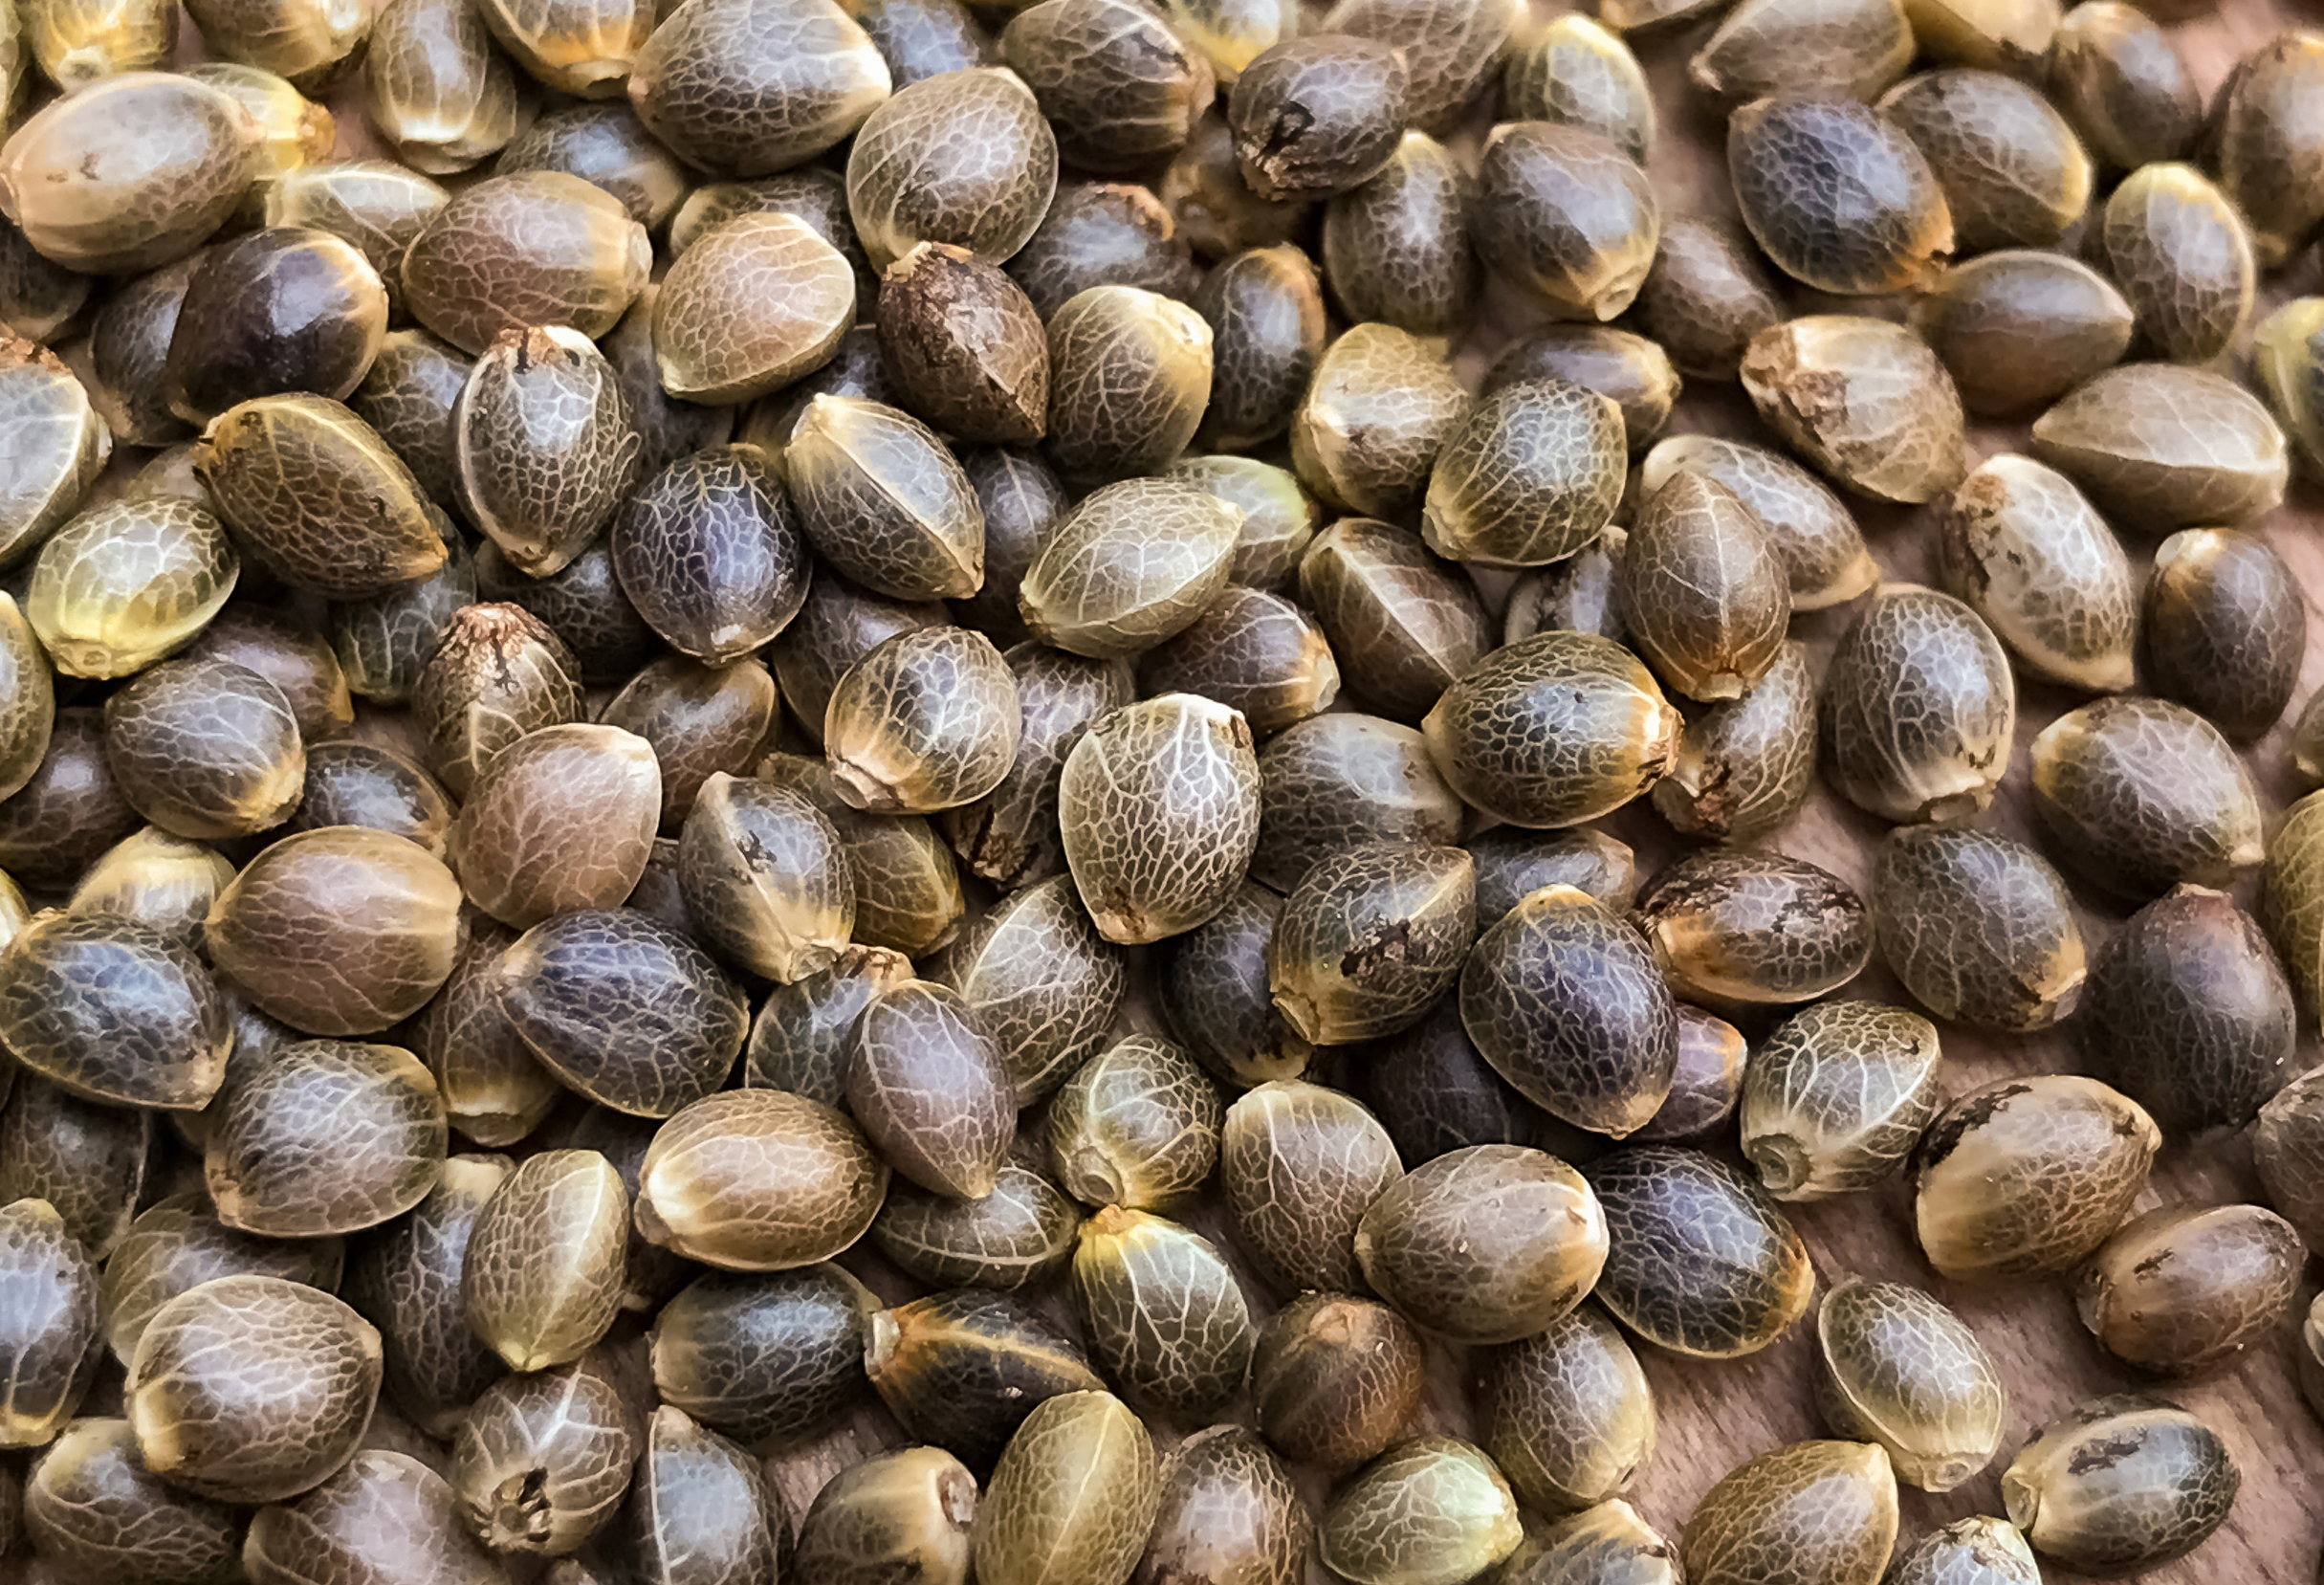
- Seed Quality: You need mature, viable seeds. How to identify them?
- Appearance: A healthy seed has an oval, slightly elongated shape, a smooth or slightly striped shell ranging from light gray to dark brown with a glossy sheen.
- Touch: It is firm and does not crush under light pressure.
- Poor-quality seeds: White, green, wrinkled, very small, or break easily. It’s best to discard them immediately.
- Preparation (Optional, but Recommended):
- Soaking: Before the main germination, you can soak the seeds for 12-24 hours in a glass of clean water at room temperature. This softens the shell and kickstarts metabolic processes. You can add a growth stimulant (e.g., “Epin” or aloe vera juice) in a low concentration.
Part 2: Main Germination Methods
There are several reliable methods. Choose the one most convenient for you.
Method 1: Between Moist Paper Towels/Cotton Pads (The Most Popular and Visual)
- What you need: Two clean plates, paper towels, cotton pads, or gauze, water, a plastic bag or transparent container to create a mini-greenhouse.
- Process:
- Moisten the paper towel so it is thoroughly damp but not sitting in a pool of water.
- Place the seeds on one towel and cover with the second one.
- Put the “sandwich” on a plate and place it in a warm (+22…+26°C / 72…79°F), dark place (e.g., a cupboard).
- Cover the plate with another plate, a bag, or a container to maintain humidity.
- Check the seeds 1-2 times a day, preventing the towels from drying out. Gently re-moisten them with a spray bottle.
- Within 24-72 hours, the seeds will crack open, and a white root (radicle) 0.5-1.5 cm long will appear. This is the perfect moment for planting!
Method 2: Germination Directly in Soil (The Most Natural and Safest for the Root)
- What you need: A light, airy, low-nutrient substrate (peat or coconut pellets, seedling mix), cups, plastic wrap.
- Process:
- Fill a cup with moistened substrate.
- Make a hole 1-1.5 cm deep.
- Place the seed inside and gently cover it, without compacting the soil.
- Water lightly around the hole.
- Cover the cup with plastic wrap for a greenhouse effect and place it in a warm spot.
- The sprout will emerge on the surface in 3-7 days. The plastic can then be removed.
Method 3: Germination in Water (Simple but Requires Attention)
- Process: Simply place the seeds in a glass of clean water at room temperature in a dark, warm place. Important: as soon as the root tip appears (usually within 24-48 hours), the seed must be immediately planted in the substrate. Do not keep it in water longer—the sprout will suffocate.
Part 3: Planting the Germinated Seed
This is a critical moment! Act carefully.
- Prepare a pot with light, moist soil.
- Make a hole 1.5-2 cm deep.
- Using tweezers or very carefully with your fingers, pick up the germinated seed without damaging the delicate root.
- Place it in the hole with the root pointing down. The cotyledons (future first leaves) should face upward.
- Gently cover with loose soil, without pressing down.
- Water with a small amount of water around the hole to settle the earth.
- Place in a warm location (+24…+28°C / 75…82°F). For the first 1-2 days, you can cover it with the top half of a plastic bottle to maintain humidity.
Part 4: Common Mistakes and How to Avoid Them
- Planting too deep: The sprout won’t have enough strength to break through. Depth should be no more than 2 cm!
- Overwatering: The most common cause of death. The substrate should be damp, not soggy. Stagnant water = rot and fungus.
- Drying out: The seed shell will harden again, and the sprout will die.
- Insufficient heat: At temperatures below +20°C (+68°F), the process can slow down significantly or stop.
- Rough handling: A broken root means death for the seed.
- Germinating for too long: If the root grows longer than 2-3 cm, it becomes brittle and easily damaged during planting.
Conclusion
Germinating hemp seeds is not rocket science, but a subtle art based on attention and understanding of biological processes. Patience, cleanliness, proper moisture, and temperature are your main allies. When you see the first two round leaves (cotyledons) emerge from the soil, you’ll know you’ve given your plant the best possible start in life.
Good luck with your legal and fascinating agronomic experience!
Frequently Asked Questions
1. Is cannabis legal in this region?
Cannabis laws vary by location and are subject to change. We recommend checking current local regulations and always complying with applicable laws.
2. How does the delivery process work?
Our delivery process is designed for privacy and convenience. Contact details and procedures are provided through secure channels.
3. What payment methods are accepted?
Payment methods vary by location and service provider. Contact your local representative for available payment options.
4. Is the service discreet?
Professional discretion is our priority. All services are conducted with respect for privacy and confidentiality.
Leave a Reply